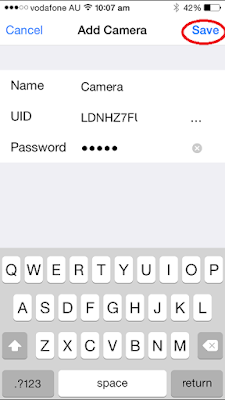
Click on Add Camera, then QRCode.
Scan the QRCode on the side of the camera.
Type the password on the side of the camera under the QRCode usually admin, then press save, then Done
Click on the (i)
Now plug in your camera into the LAN port (network connection into your modem/router)
Click on Reconnect until the camera says Online, now click on Advanced Setting
Click on WiFi, then select your Wifi network
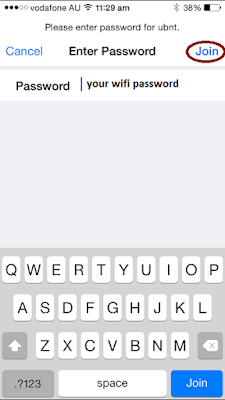
Enter your Wifi Password, then click Join, then click back 3 times.
Disconnect from the wired LAN connection as your camera should now work on the wifi network.
Click on Camera, your camera should now appear
When you swipe your finger left, right, up or down then camera will move.
Some Advanced Settings Screenshots
There are more Advanced settings but you will need to log into the camera to change these.
To do this you will need to find your cameras IP address.
On your computer you can use a free scan tool wakemeonlan : http://www.nirsoft.net/utils/wake_on_lan.html
direct link : http://www.nirsoft.net/utils/wakemeonlan.zip
Or on you Mobile you can use iNet Network Scanner : https://itunes.apple.com/au/app/inet-network-scanner/id340793353?mt=8
Once you find your EasyN cameras IP address type the Ip address into IE, FireFox, Google or Safari Browser then ":81/web/admin.html"
Eg Http://192.168.2.20:81/web/admin.html
Username and password is admin
Click On settings
Then Compatibility view
Enter the IP Address of the camera then add
Click on Sign In
Then the settings button
This is what it looks like in non compatibility view
This is what it looks like in compatibility view
Click on Options
To reset the camera to default, turn the unit upside down and use a paperclip to reset the unit.
This can also be done from the settings menu as well.
System Settings, System Maintenance, Default Values.


No comments:
Post a Comment